iPhone Photography Tips: How to Take Stunning Photos with Your iPhone
- Iphone
- March 4, 2025
- 967
The iPhone has become a powerful tool for photography, thanks to its advanced camera system, easy-to-use features, and a wide array of editing options. While professional-grade cameras offer more control, the iPhone is more than capable of capturing stunning photos and videos with a few simple techniques and tips. Whether you’re capturing everyday moments, landscapes, portraits, or even action shots, your iPhone can help you achieve beautiful results.
In this guide, we’ll explore how to use your iPhone’s camera to take professional-quality photos, along with some recommended apps and editing tips to elevate your shots.
1. Master the Basics: Camera Settings and Controls
Before diving into advanced techniques, it’s important to understand the basic controls and settings on your iPhone’s camera.
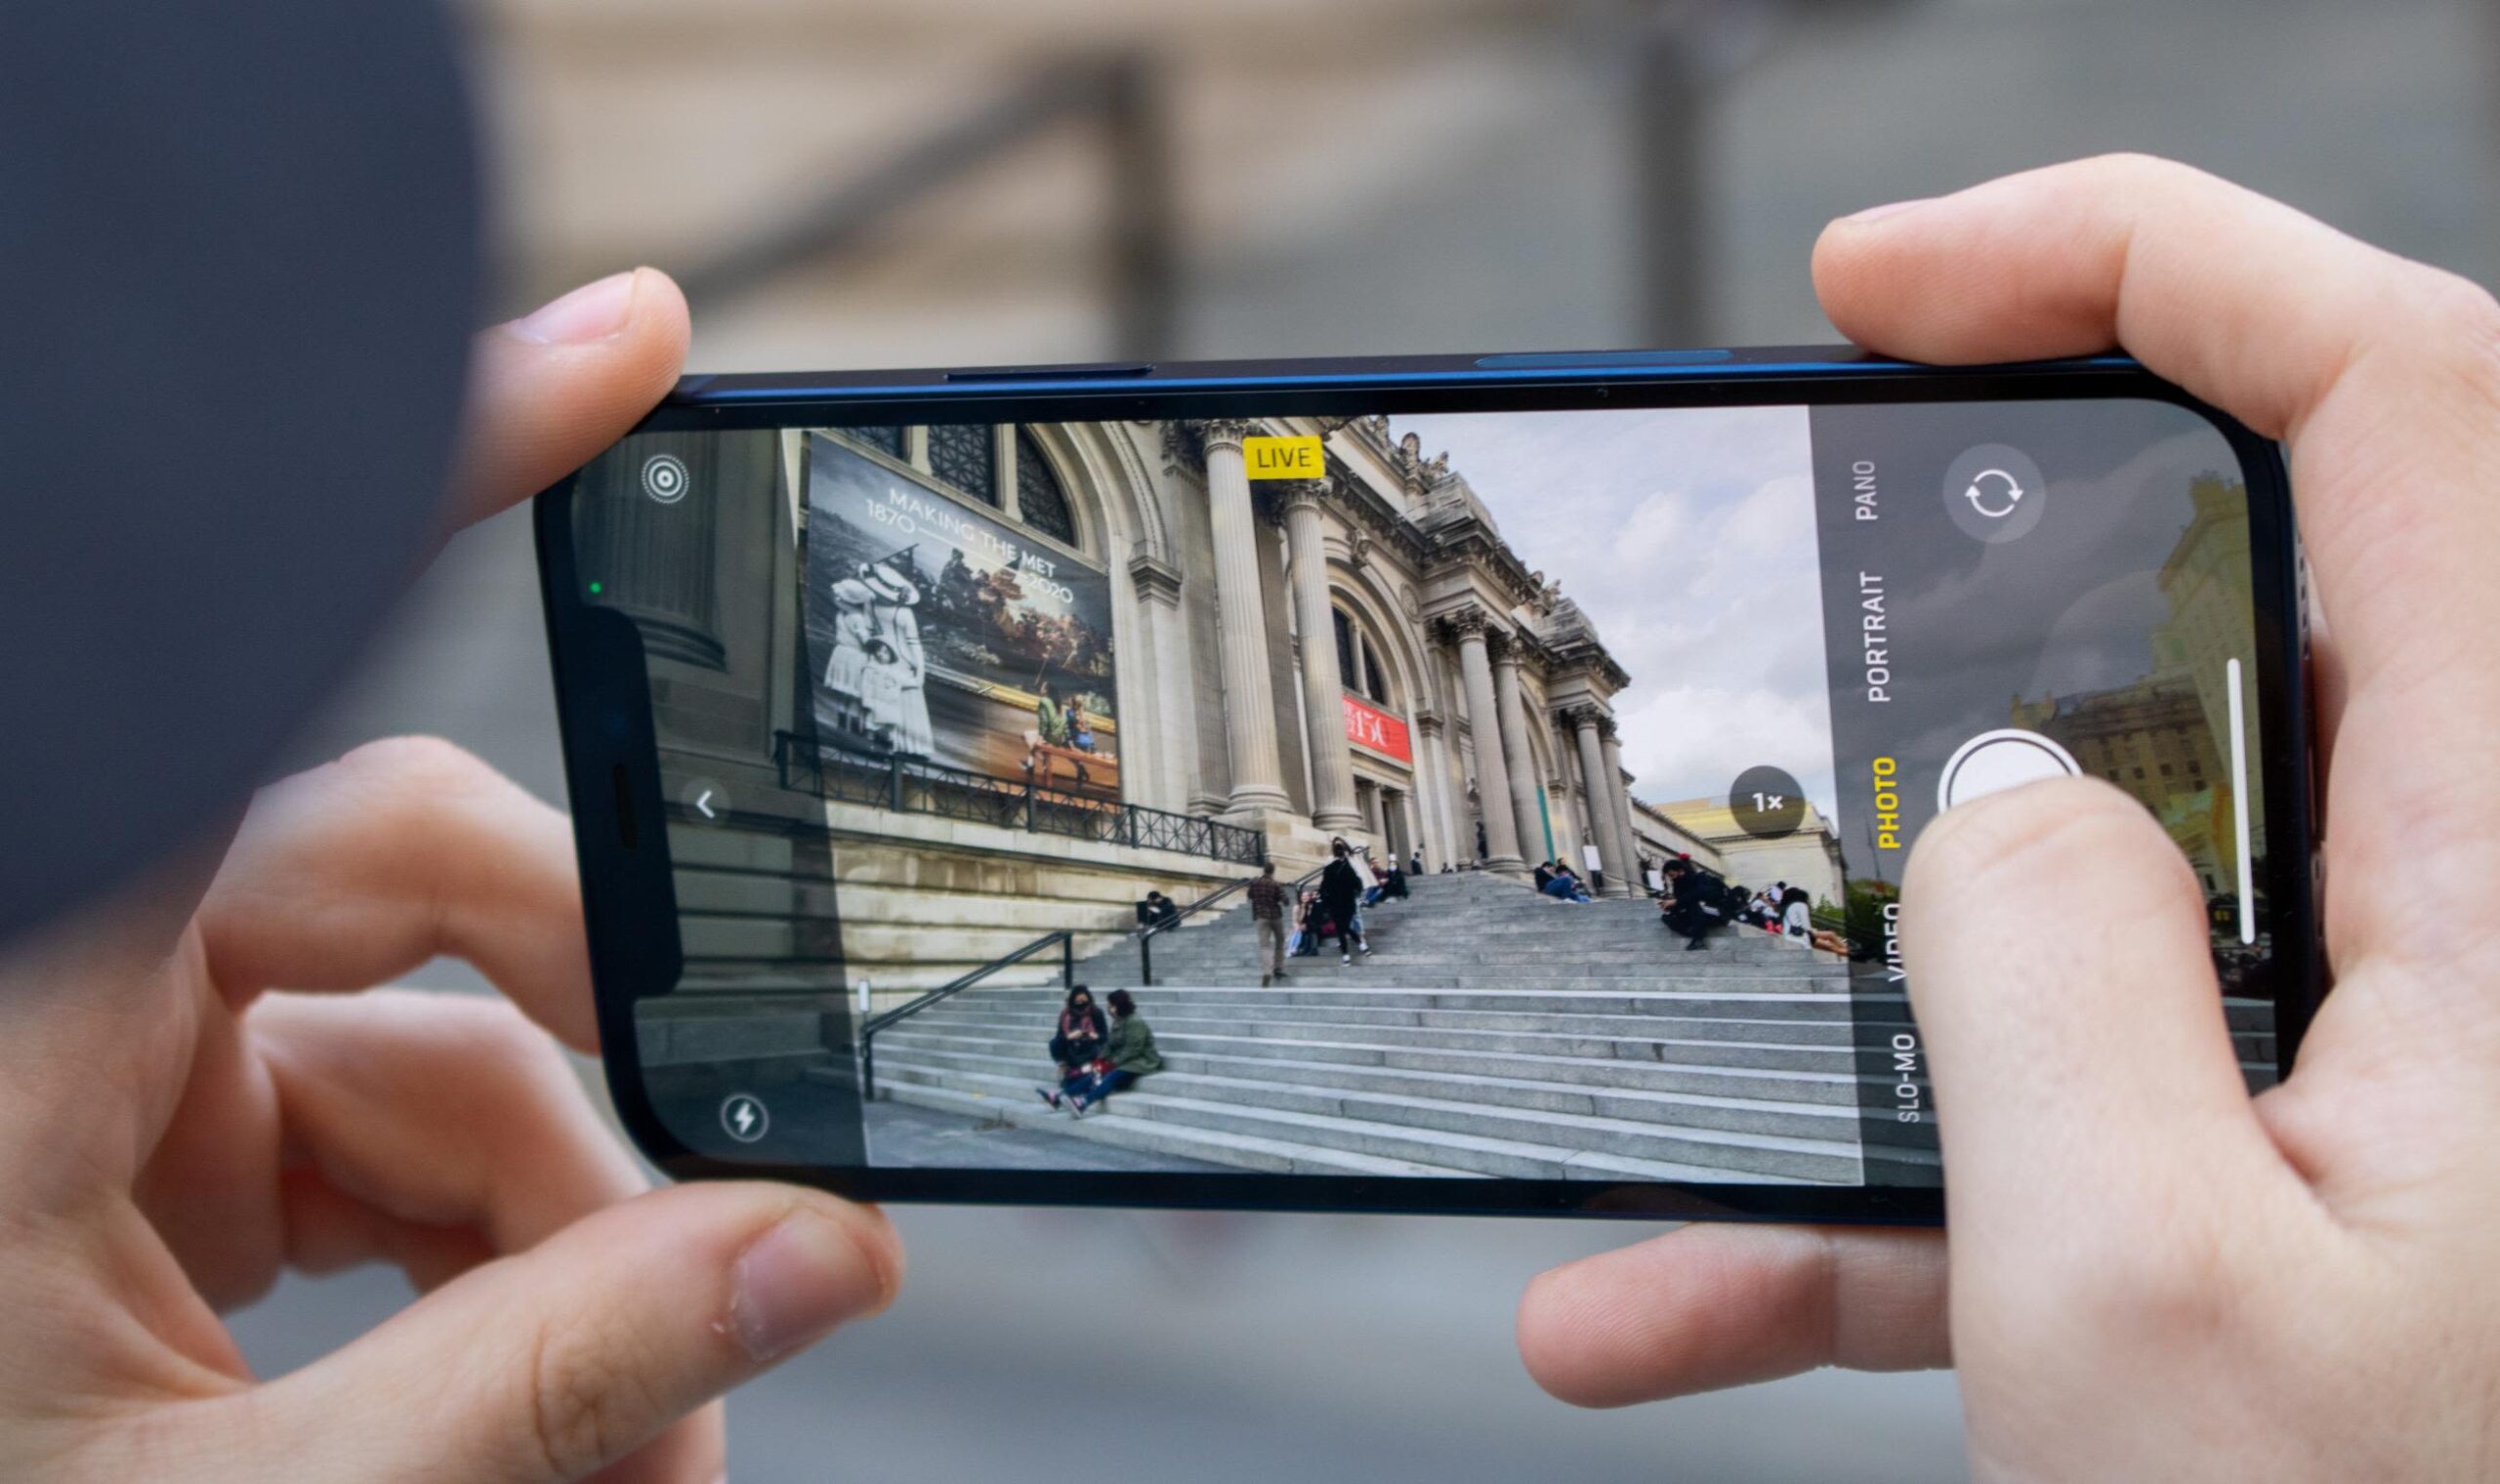
How to Access the Camera:
- Simply swipe left from the lock screen or tap the camera icon on the home screen to open the Camera app. You can also access it by swiping up or down on the lock screen (depending on the iPhone model).
Camera Modes to Know:
- Photo: The default mode for everyday photos.
- Portrait: Use this mode for stunning, professional-looking portraits with a blurred background (bokeh effect).
- Night Mode: Automatically activates in low-light conditions, allowing you to capture clear and bright images in dark environments.
- Pano (Panorama): Use for capturing wide, sweeping landscape shots.
- Video: For recording video footage, including 4K and slow-motion options.
- Time-lapse: For capturing fast-moving scenes, such as sunsets or busy city streets, at a slower, more dramatic speed.
2. Understand Focus and Exposure
One of the most important aspects of iPhone photography is getting the right focus and exposure. Both play a crucial role in making your photos appear sharp and well-lit.
How to Adjust Focus and Exposure:
- Tap to Focus: Tap on the part of the screen where you want to focus, and your iPhone will adjust the focus automatically.
- Adjust Exposure: Once you’ve set the focus, you’ll see a small sun icon next to the focus box. Slide your finger up or down to increase or decrease exposure (brightness).
- Lock Focus and Exposure: If you want to lock both the focus and exposure for a scene, tap and hold on the screen until you see AE/AF Lock. This ensures that the settings remain unchanged while you compose your shot.
3. Use the Grid to Improve Composition
The rule of thirds is one of the most popular principles of photography, and you can use your iPhone’s grid feature to help you apply it easily. The grid divides the screen into nine equal parts and helps you position your subject in a way that creates a more balanced and visually appealing photo.
How to Enable the Grid:
- Go to Settings > Camera and toggle on Grid. You’ll now see the grid overlay on your camera screen, making it easier to compose your shots with balance and symmetry.
4. Utilize Portrait Mode for Stunning Photos
Portrait mode, available on recent iPhone models, allows you to take professional-looking photos with a blurred background, making the subject stand out sharply. This bokeh effect mimics what you’d see in photos taken with expensive DSLR cameras.
How to Use Portrait Mode:
- Open the Camera app and swipe to Portrait mode.
- Ensure you are about 2 to 8 feet away from your subject for the best effect.
- The iPhone will automatically detect the subject’s face and apply the background blur. You can also adjust the lighting after the shot, using the “Natural Light,” “Studio Light,” “Contour Light,” and other available options.
This mode works best for portraits of people, but you can also use it creatively for pets, flowers, or any subject you want to highlight.
5. Use Night Mode for Low-Light Photography
Night Mode is automatically enabled when your iPhone detects low-light conditions. This feature allows you to capture clear, detailed photos without using a flash, which can often create harsh and unnatural lighting.
How to Use Night Mode:
- When you’re in low light, Night Mode will appear automatically on the camera interface. You’ll see a yellow moon icon.
- Hold your iPhone still while the shutter is open (the screen will show a countdown for the exposure time). The longer the exposure, the more light the camera collects, resulting in a brighter and clearer image.
- For even better results, use a tripod or stabilize your iPhone on a flat surface to avoid motion blur.
Night Mode works well in a variety of lighting situations, such as dimly lit rooms, evening shots, or capturing cityscapes at night.
6. Experiment with Different Lenses (iPhone Pro Models)
If you have an iPhone Pro model, you’ll have access to multiple lenses, including an ultra-wide, wide, and telephoto lens. Each lens offers a unique perspective and can be used to enhance your photos.
How to Switch Lenses:
- In the Camera app, tap the 0.5x, 1x, or 2x buttons to switch between the wide, ultra-wide, and telephoto lenses.
- Ultra-wide (0.5x): Perfect for capturing sweeping landscapes or wide group shots.
- Wide (1x): The default lens for everyday photos.
- Telephoto (2x): Ideal for zooming in on distant subjects without losing image quality.
Experiment with different lenses to add variety and depth to your photography.
7. Use Burst Mode for Action Shots
When you need to capture fast-moving subjects, such as athletes or pets, Burst Mode allows you to take multiple photos in quick succession, increasing the chances of getting the perfect shot.
How to Use Burst Mode:
- Press and hold the shutter button (white circle) to activate Burst Mode.
- Your iPhone will take a rapid series of photos. You can then go into the Photos app and select the best shot, discarding the rest.
Burst Mode is also useful for capturing moments when you can’t predict exactly when the perfect shot will happen.
8. Editing Your Photos for Professional Results
Once you’ve captured your photos, editing them can make a huge difference in enhancing their quality. The Photos app on your iPhone comes with a variety of powerful editing tools to adjust brightness, contrast, saturation, and more.
Editing Tools in the Photos App:
- Auto-Enhance: Tap the magic wand icon to let the iPhone automatically adjust your photo for better contrast, brightness, and color.
- Filters: Experiment with different filters to create a specific mood or style.
- Adjust: Tap the dial icon to manually adjust exposure, brightness, contrast, shadows, and more.
- Crop and Rotate: Use the crop tool to straighten your photo or change its aspect ratio.
For even more advanced editing, you can use third-party apps like Snapseed, VSCO, or Adobe Lightroom for professional-quality edits, offering more advanced controls and features like selective adjustments, sharpening, and noise reduction.
9. Shoot in RAW for Maximum Flexibility (Pro Models)
If you’re serious about photography and want to retain the highest possible image quality for editing, shoot in RAW format. RAW files capture all the data from your camera’s sensor, giving you much more flexibility in post-processing.
How to Enable RAW:
- If you have an iPhone 12 Pro or later, open the Camera app, tap the RAW icon (available in Photo or ProRAW mode), and start shooting.
- RAW photos are larger in file size but offer greater detail and allow for more precise adjustments when editing.
For advanced users, editing RAW files in apps like Adobe Lightroom can yield stunning results.
10. Recommended Photography Apps
There are plenty of apps that can take your iPhone photography to the next level, offering additional controls, filters, and editing features. Some of the best options include:
- Halide: A powerful camera app that gives you manual controls, including adjusting shutter speed, ISO, and focus.
- VSCO: A popular editing app that lets you apply high-quality filters and fine-tune your photos with advanced editing tools.
- Snapseed: A free, professional photo editor with tools for color correction, lens blur, and detailed retouching.
- Lightroom: For those who want to work with RAW files and have access to professional-level photo editing capabilities.
Conclusion: Take Your iPhone Photography to the Next Level
Your iPhone is more than capable of capturing stunning, high-quality photos with just a little know-how. By mastering the basics like focus, exposure, and using the right camera modes, you can create photos that rival those taken with professional cameras. Coupled with editing apps and some creative techniques, you’ll be able to capture breathtaking shots in any situation.
So, grab your iPhone, experiment with these tips, and start capturing beautiful moments that you’ll be proud to share. Happy shooting!